| |
|
Click on a thumbnail picture below to see the full size version.
|
33 Entries.
|
|
Monday, April 13
|
View Page
|
 |
Seed Starting Day
What can go wrong starting seeds on Monday the 13th ;-) This year's seeds selection was easy.
2154 Sperry 2023 (F: 1904.4 Sperry '22 x M: 2365 Wolf '21)- This was the seed that grew the 2587-pound pumpkin last year so it is hard to select another seed over this one.
2587 DeBacco 2025 dmg (F: 2154 Sperry '23 x M: 2670 Thompson '24) While the disqualification came from an odd edema (what looked like fish eggs) on the surface of the pumpkin just days before the weigh-off, after seeing that it went 18% heavy and was great in every other way, this seed choice was an easy. The pollinator plant was grown by another grower who reported some of the most aggressive plant growth they had ever seen. With an aggressive pumpkin on one side of the lineage and an aggressive plant on the other this makes a great combination. While the plant the pollen came from unfortunately contracted yellow vine later in the season the actual pumpkin production could not be determined. However, others that grew the 2670 Thompson were happy with the results.
|
|
|
Friday, April 17
|
View Page
|
 |
Peat Moss Additions
In order to keep a combination of good soil water holding capacity while also maintaining good aeration. Peat moss offers a great combination of these two properties. About 20 cubic feet of peat moss was added per 1,000sq.ft. just before planting. This gives the soil a spongy feeling and helps to help it resist compaction in season.
|
|
|
Wednesday, April 22
|
View Page
|
 |
Soil Heating Cables
The seeds have turned into seedlings, so final soil preparations are underway. After the heating cables are installed, then drip tape is put in place followed by the cold frames. All of these growing support systems will be put in-place and then a few days to check all systems before the plants are added.
|
|
|
Monday, April 27
|
View Page
|
 |
2154 Sperry 2023 Seedlings
The seeds went two for two so both were planted as each seedling looks almost identical and both are looking great.
Note: The plant on the right-hand side of this image is the keeper.
|
|
|
Monday, April 27
|
View Page
|
 |
2587 DeBacco 2025 dmg Seedlings
These two seedlings look nearly identical and a third seedling was given to another grower looking for a plant. Time will tell if the plants will continue to look as similar.
Note: The plant on the right-hand side of this image is the keeper.
|
|
|
Thursday, May 21
|
View Page
|
 |
Cull Day
All of the seedlings continued to grow at near identical rates. Here both 2587 DeBacco plants can be seen with one being 10ft and the other 9.75ft. The 2154 Sperry is nearly the same so the culling process was just as difficult.
These plants got bigger than normal before the official cull selection was made, since the hope was one would be a clear winner. In the end it is good to know at this point everything is very consistent and looking good.
|
|
|
Thursday, May 21
|
View Page
|
 |
2154 Sperry 2023 Chosen One
It was hard to make the selection as both plants continued to look nearly identical so it came down to a few small details that lead to this one being the selected one.
|
|
|
Thursday, May 21
|
View Page
|
 |
2587 DeBacco 2025 dmg
The plants looks very airy since the other plant was just removed and some of the vines initially buried. Once the plant is exposed to the sun the next day the leaves will straightened out and the plant will start looking like it should.
|
|
|
Friday, June 12
|
View Page
|
 |
2154 Sperry 2023 Pollination Day
The plant is looking great and the blue cup near the chair that is in place for shade is the pollination. The first side vines are close to being terminated at about 15 ft. long so this along with the distance out which is 17ft is and the calendar date all line up. Vine burying is underway and the weed block is being removed as the plant grows. Everything seems to be proportionally growing as it should, the rate just seems a little behind what is generally expected which could be in part due to some of the swings in weather this spring.
|
|
|
Friday, June 12
|
View Page
|
 |
2154 Sperry 2023 Female Flower
Before the flower opened the petals did not look symmetrical, which was thought to carry over to the lobes, but this was not the case. The 4-lobes look very symmetrical so this is good to see as it seems that there may be some correlation of pumpkin symmetry and initial lobe symmetry.
The 2587 DeBacco is the pollinator that will be used even though there is some genetic similarity.
|
|
|
Sunday, June 14
|
View Page
|
 |
2154 Sperry 2023 Anthesis Application
This pollination was treated 48-hours after pollination with Anthesis which is a combination of plant hormones to hopefully increase the duration and the rate of cell division. This will typically result in a smaller pumpkin in the early stages of development but this should be for only the first 37 days, after this it should grow at a pace faster than an untreated pumpkin. (At least by the grower-based data that has been collected over the years.)
|
|
|
Tuesday, June 16
|
View Page
|
 |
2587 DeBacco 2025 dmg Pollination Day
This has been a very aggressive plant which is in part due to the 2154 Sperry (female side), but probably the 2670 Thompson pollinator to the 2587 is a greater contributing factor. This is what the original plan was, to try and increase the aggressiveness of the plant to allow for a larger plant in the same duration of time to help better support a growing pumpkin without altering the timing of the vegetative vs fruiting cycle.
Utilizing the natural aggressive growth along (genetics) with carbon dioxide enrichment (environmental) and rooting hormone (CloneX gel) applied at each node is the combination to help maximize early season plant size while minimizing the time it takes to do this.
There were some earlier pollinations under the chairs, but the one that is seen open near the blue cup is in the sweet spot on the plant and also on the calendar. There are a few secondaries already terminated at about 15ft. each and the pollination is over 20ft. out on the main so what is not to like.
|
|
|
Tuesday, June 16
|
View Page
|
 |
2587 DeBacco 2025 dmg Female Flower (x 2154 Sperry)
This is a very symmetrical 5-lobe flower that will hopefully result in a symmetrical pumpkin. The pollen that can be seen is from the 2154 Sperry which is also the same genetics that grew the 2587 so there is some similarity, but concentrating good genes is not a bad breeding strategy.
Remember, when pollinating you want to get the pollen toward the center bottom of the lobes as this is where the nectar is and this is where the bees go. While it looks visually appealing to have the pollen grains covered on the top as shown in the image, this are may not be the most efficient to actually getting a pollination to take. Also, one flowers has more than enough grains of pollen to successful pollinate many flowers, but as growers we want to be able to see the pollen, even though botanically this is not what is important.
Shortly after this image, the flower is covered with a blue cup and a chair with a white sheet is replaced over the flower to keep some shade over the flower. The goal is to keep it a little cooler so it can hopefully fully develop without getting heat shock during the early (and critical) developmental process.
|
|
|
Thursday, June 18
|
View Page
|
 |
2587 DeBacco 2025 dmg Anthesis Application
This shows what the actual misting of Anthesis should look like on the female flower about 48-hours after pollination. The exact timing here is about 45 hours after pollination because the application was made just before sunrise. The reason for this is to reduce some of the UV degradation of the hormones and it keeps the water droplets on the small pumpkin a little longer.
It may be a little hard to see, but the petals, stem, petiole, vine and tendril are not intentionally sprayed. These plant structures may receive some unintentional over spray, but this is nothing to worry about. In addition, the flower petals are left on as this will likely produce some natural ethylene which can help encourage cell division. Many growers seem to remove these very early on for fear of rot, but the degradation process may actually serve a beneficial purpose.
One of the biggest threats to giant pumpkins (at times) is the grower;-)
|
|
|
Thursday, July 2
|
View Page
|
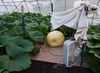 |
Day 20 F: 2154 Sperry (x M: 2587 DeBacco dmg)
OTT = 177.5"
Est. Weight = 130 pounds
Overall, the pumpkin and plant look good. It seems the plant is a little slow to fill-in the allowed space as some of the secondaries appear to have stunted. However, some triple 10 (10-10-10) was sprinkled on the main vine root nodes and each morning some water via a watering can has been added. This method has worked in the past to help kick start some secondary growth that seems to be slow or stunted.
If this is identified early and only a small sprinkle (about what three finders can pick-up) is added to the node at most there is the chance at helping to encourage growth while also minimizing the chance at burn or plant damage.
|
|
|
Monday, July 6
|
View Page
|
 |
Day 20 F: 2587 DeBacco dmg (x M: 2154 Sperry)
OTT = 200"
Est. Weight = 183 pounds
The pumpkin is very symmetrical and round. almost "fish egg" like. The plant has been very aggressive at growing (unwanted) tertiary vines. Even though during the vine burying process these vines were thought to be pruned it seems that many were missed. In actuality, the tertiary vines have been slow to develop overall, so at time of burying there was nothing to pinch and now they have developed and are popping up very frequently.
|
|
|
Wednesday, July 8
|
View Page
|
 |
Natural Light on a Sunny July Day
The use of shade cloth has become increasingly common among giant pumpkin growers, with many reporting anecdotal improvements in plant health. Early in the season, shade cloth can help reduce leaf burn, maintain more consistent canopy temperatures, and mitigate wilting and water stress associated with intense sunlight and heat.
Despite these observations, few growers quantify actual light intensity-specifically PAR (Photosynthetically Active Radiation). PAR represents the wavelengths between 400-700 nm, which are the primary spectrum used in photosynthesis. Accurate measurement requires a dedicated PAR meter, a tool that can be difficult to justify given its cost relative to the data it provides. To help growers better understand light intensity and the impact of shade netting, the following information offers practical reference values without requiring specialized equipment.
For comparison, a "control" reading was taken on a sunny July day in Southern New England. Measurements were collected around midday in an open lawn under full sunlight. The resulting PAR value was 1915 μmol/m²/s. For context, typical maximum PAR levels under completely clear midsummer skies approach 2000 μmol/m²/s, indicating that the conditions during measurement were near peak natural light intensity.
It is important to note that PAR readings fluctuate slightly due to passing high level clouds and the sensitivity of the meter, which detects even minor variations in light. For clarity and consistency, average values are used for comparison throughout this discussion.
|
|
|
Wednesday, July 8
|
View Page
|
 |
Under a Shady Tree
On the same sunny July day, a second measurement was taken approximately 100 feet from the full sun control reading of 1915 μmol/m /s, this time beneath a large maple tree. The resulting PAR value dropped to 105 μmol/m /s, clearly demonstrating the substantial reduction in light intensity caused by canopy shading. For pumpkin growers, it is well understood that planting near trees should be avoided; however, this comparison highlights an important parallel within the plant itself. When a pumpkin leaf grows beneath another leaf, it receives similarly limited light.
This underscores the importance of maintaining a disciplined pruning strategy that keeps leaves on a uniform plane with minimal overlap. The goal is a pond lily pad canopy which is a broad, evenly spaced leaves that fully cover the area without shading one another.
Although this example uses a tree canopy, the same principle applies under a pumpkin leaf, and the reduction in PAR can be nearly as extreme. In this case, the shaded reading represents roughly a 95% decrease in light intensity compared to the control measurement.
Growers have also asked how these PAR reading may change based on the time of day and I will refer you to this DeBacco University "Student Series" video that was taken on a different day in a different location, but demonstrates the basis trend... YouTube
|
|
|
Thursday, July 9
|
View Page
|
 |
Shade Nettings Impacts and Percentages
A PAR measurement taken beside a plant growing under 6 mil greenhouse grade plastic combined with 30% shade netting produced a reading of 902 μmol/m²/s, representing roughly a 50% reduction in light intensity compared to full sun.
This reduction exceeds the nominal 30% shade rating for several reasons. Greenhouse plastic typically filters approximately 10% of incoming light. When plastic and shade netting are used together-especially on a curved hoop structure-the combined materials diffuse and scatter light more than a flat surface would. As a result, the measured value falls well within the expected range for this setup.
For growers using only shade netting between the sun and their plants, 40% shade material is generally recommended for pumpkins and squash. The optimal percentage depends on both geographic location and crop type. For example, lettuce and other leafy greens require relatively low light and can benefit from higher shade percentages, while ferns and certain tropical species may thrive under 80% shade.
Geographically, growers located closer to the equator can typically use higher shade percentages due to naturally stronger solar intensity. For most giant pumpkin growers-who tend to be in temperate regions-30% shade when plastic is also present, or 40% shade for open field growing, serves as a reliable starting point.
Color selection introduces another layer of consideration, but that discussion will continue in the next post.
|
|
|
Thursday, July 9
|
View Page
|
 |
Shade Netting Color Options
When it comes to shade netting there are three main options. Silver, Black and White.
Silver, often sold under the brand name Aluminet, is highly reflective. This reflectivity can be beneficial for reducing heat load, but it also creates a noticeably bright appearance on sunny days which is something to consider if you have close neighbors or spend significant time near the structure. While effective, silver netting is often reported to have a shorter lifespan compared to black or white materials.
Black shade netting is widely regarded as the industry standard. It absorbs more heat, but when installed above the plants or on a supportive frame, this heat absorption has minimal impact on the crop. Black netting is easy to source, durable, and produces a subtle checkerboard light pattern underneath.
White shade netting creates a diffuse, cloud like light quality. It offers some reflectivity but generally resembles the soft, even illumination produced by standard greenhouse plastic. Many growers appreciate the uniformity of this diffused light.
Having worked with all three options, I would personally select white for its balanced, gentle light distribution. However, plants themselves are largely indifferent to color, it is the shade percentage is the factor that truly matters. Choose the color that best fits your growing environment, aesthetic preferences, and structural setup.
|
|
|
Sunday, July 12
|
View Page
|
 |
Day 30 F: 2154 Sperry (x M: 2587 DeBacco dmg)
OTT = 278.5"
Est. Weight = 478.5 pounds
Avg. over last 10 days = 34.8 lb./day
Looks like peak growth will be just under 35lb per day. This is a bit of a disappointing peak, even for what seems like lower peak growth numbers (compared to other grower's) in favor of a better chance at percent heavy and hopeful sustained growth.
If you look to the left-hand side of the image you will see a leaf with a yellow margin (edge) to it. There are also a few more with this same look down the vine toward the direction of the main vine. Looking at any diagnostics, growers would assume this is a sign of a potassium deficiency, and (based only on the image) they would be correct.
**However,** A potassium deficiency and a toxicity visually look the same. Base on soil test results this is a sign of a toxicity in the plant. This is where grower vigilance and attention to detail come into play. If you now look more carefully at the image you will notice the vine next down the line has the same yellow margin, but to a lessen extend and much past this the leaves are a consistent green. This is a sign that I am playing the line of too much and maximum the plant can handle.
Relating this to a street drag race they would call this pedaling, where you are pushing as much power as possible until the tires break loose and then backing off, but then getting back into the power again, your foot is on and off the pedal. Same concept here, the pumpkin is about to go into potassium sink mode so the goal is to ensure there is plenty there for uptake, but staying just below the excessive amount.
Last year seeing this "fingernail burn" as some have called it is a sign the plant is at the maximum, so the growers needs to recognize this and know to back-off for a period of time. The challenge is the plants needs are changing so the growers needs to make adjustments along the way to stay in the sufficiency range even though it is fluctuating.
|
|
|
Thursday, July 16
|
View Page
|
 |
Day 30 F: 2587 DeBacco dmg (x M: 2154 Sperry)
OTT = 282.5"
Est. Weight = 498.5 pounds
Avg. over last 10 days = 31.5 lb./day
This pumpkin will be curling the blossom end under soon, so hopefully it holds together. The shape of the pumpkin to this point is very round, but it is not gaining much height. The bright yellow color indicates that this should be an orange pumpkin if it makes it through the full duration of the growing season.
Growing your own seed is always interesting to see what characteristics come through, and at least to this point, plant health and a nice orange color to a pumpkin with a consistent growth rate is all I can ask for.
The plant continues to produce more than expected in the form of tertiary growth, which is continually being removed to help direct some of that energy to the pumpkin;-)
|
|
|
Wednesday, July 22
|
View Page
|
 |
Day 40 F: 2154 Sperry (x M: 2587 DeBacco dmg)
OTT = 334"
Est. Weight = 810 pounds
Avg. over last 10 days = 33.1 lb./day
The overall shape of the pumpkin is starting to look like the one I grew last year and the growth curve is similar but about 10% behind by the tape. The one aspect that is different is the blossom end as it is starting to curl under and getting harder to inspect. The sonicator has been placed to ensure the "sound" can travel under the pumpkin. It is important to remember that sound waves at the ultrasonic wavelength behave more like laser beams and not like the typical sound as we may think. A speaker will fill a room with sound, but in the case of ultrasonic wavelengths these travel only in a line. So, if the "speaker" is not pointing in the direction you expect a mouse to walk, it will be minimally effective.
In general, the plant health is good and the pumpkin is on a stable growth curve that while behind last year is showing some similarities, with color that is a little less on the orange scale, even for a 40-day old pumpkin.
|
|
|
Wednesday, July 22
|
View Page
|
 |
Day 40 F: 2154 Sperry (x M: 2587 DeBacco dmg)
Blossum End View
While I can still get a picture this just shows the blossom end that is slowly curling under the pumpkin. Ideally this should take some of the direct pressure off the area. Here the area the sonication is aimed can also be seen. Odd that the bottom has a slight upward curve to it despite being on the nice and slick mill fabric.
|
|
|
Sunday, July 26
|
View Page
|
 |
Day 40 F: 2587 DeBacco dmg (x M: 2154 Sperry)
OTT = 337"
Est. Weight = 831 pounds
Avg. over last 10 days = 33.25 lb./day
It is a bit surprising to see a gain in overall estimated pounds per day from day 30 measurements, but to say the peak growth is just a little over 33 pound per day is also a bit of a disappointment. The lineage has some high percent heavy in the background, so hopefully this carries the rough.
What is very evident is the orange color which is already showing through even though it is only day 40. On the stem side (which really can not be seen in the picture) there are signs of "Calai starburst" developing. I am not sure if this is an official term, but for those who have been growing for more than a couple of years may remember the 846 and 869.5 Calai. These were some of the top orange producing seeds back in the day. I was fortunate to grow the 869.5 Calai (from the year 2000) and it certainly lived up to the hype as it was a great shape and bright orange colored pumpkin. Hard to believe that this pumpkin tapes very close to that pumpkins final weight and it is only day 40, this shows how far the growing practices have come.
The blossom end is basically out of sight as it has curled under so the hope is it will be good for the life of the pumpkin. It certainly provides a nice consistent orange color over the entire blossom end which is an interesting look.
|
|
|
Saturday, August 1
|
View Page
|
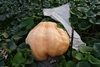 |
Day 50 F: 2154 Sperry (x M: 2587 DeBacco dmg)
OTT = 369.5"
Est. Weight = 1085.5 pounds
Avg. over last 10 days = 27.5 lb./day
The Good:
The pumpkin is taking on the shape of the one I had last year with a little less orange color. This one is a bit paler orange with some more cataloging on the skin, especially for a 50-day old pumpkin. The ribs and the dips are all very similar to what I had grown last year and this the same seed, so it is nice to see some consistency. It seems other growers have gotten a more round and tall-ish shape as well from this same seed line. The growth curve is not impressive, but it is consistent just like last year. There are still a proliferation of tertiary vines with some fingernail leaf burn as the nutrients in the soil are released as the soil warms so feeding has been hard to regulate with this biological variable.
The one key difference from last year is the sucked in blossom end that has also curled mostly under the pumpkin. It is still possible to see the flower but it takes some double yoga bends and contortions to be able to see it now.
The Bad:
Upon inspecting the flower, there was some cave darkness that could be seen. The blossom end did not pin-hole, it split wide open going right through the flower. No evidence of any soft tissue or rot, as it probably just occurred. Looks like my plans for tomorrow have changed to pumpkin and plant removal.
|
|
|
Sunday, August 2
|
View Page
|
 |
2154 Sperry Plant Overview
Despite the pumpkin splitting this is an opportunity to get a full analysis of the plant to gain some insight on how the plant care was going. Sometimes things can look good on the outside, but inspecting vines, roots and petioles at this point in the season can reveal how the plant was set-up to perform for the end stretch of the season.
From an external look the plant overall is looking great with maybe some elevated nitrogen release in the older portion of the plant. This likely came from the natural heating of the soil and the release of residual nitrogen from the soil. Additions were made carefully after noticing this and the newer growth seems to have less of the nitrogen bloat.
The variable factors of natural soil microbe release of nitrogen is what makes it a difficult nutrient to manage in addition to the difficult method of getting an accurate test value. To do a nitrogen test properly, the soil should be sampled to a depth of 12" and the same should be brought to the lab in less than 24-hours in a breathable bag/container. This is the lab/science method of determining nitrogen levels, but the grower way is to look at the plant since pumpkins tend to show levels of nitrogen in the plant fairly easily.
However, nutrients like phosphorus does not visibly show elevated levels (or toxic levels) so many growers over add without realizing since there are no obvious signs of a toxicity. This is where the importance of a soil test comes into play to reduced the chance of having nutrient lock out for a nutrients that does not visually show well in the plant.
|
|
|
Sunday, August 2
|
View Page
|
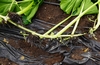 |
2154 Sperry Roots
Hard to improve from this root structure. The CloneX gel is working as intended with a highly branched root system developing at the node. This increases the surface area and creates efficient water and nutrient absorption. It is also great to see that the same branching has occurred at multiple nodes and not just one, but the continual line down the vine.
|
|
|
Sunday, August 2
|
View Page
|
 |
2154 Sperry Plant Removal
Upon removing the plant there was basically no visual signs of disease. The roots looked great, so did the vine and petioles. There may have been a little browning at the crown (the oldest roots) but they were not rotting. Keeping a fan on the crown is a good way to try and be preventative to potential issues. While this may not prevent the below ground issues to can help keep the surface dry and moving the drip tapes away from this area is also another way to try an prevent excessive moisture to this area.
The structure looks so empty without all the leaves and plant. The pumpkin does seem to look a little bigger now that the full size can be seen that is not blocked by the leaves.
Going with the traditional Christmas Tree or Box method makes the removal process very standardized. Removing the plant is always labor intensive, but having the vines organized makes the removal process as "easy" as possible and the clean-up is as efficient as it can be.
|
|
|
Sunday, August 2
|
View Page
|
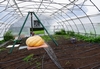 |
Tripod Set-up Over the 2154 Sperry
Even though the pumpkin will not make it to an official weigh-off it is still interesting to know what the pumpkin actually weights. The 2154 Sperry last year went very heavy for me at 18%, but this was a 110 day old fruit. So, it will be interesting to see what this pumpkin only being 50 days old will weigh and how it may relate to being under, on, or over the chart weight.
There is some data for a pumpkin growing on a scale that shows it is not until late in the season the pumpkins actual weight is more than the estimated weight. Here is a link to the image taken showing Dr. Chris Rodebaugh pumpkin OTT weight compared to the actual scale weight from the GPC Convention posted on IanP diary.
https://www.bigpumpkins.com/Diary/DiaryViewOne.asp?eid=355384
So, while this is also an "n" of one as far as any statistics are concerned it will still be interesting to see what the actual weight will be.
While the scale may not be officially calibrated, I did once pre-weigh a pumpkin and then brought it to a weigh-off and the scale was only a few pounds off which could have been the longer vines that were not cut until at the weigh-off.
The short tripod has been set-up since it is in the growing structure and also the pumpkin only has to be lifted about an inch above the ground. All lifting straps are hanging in the bunch of the in-line scale can be teared to ensure the weight seen on the digital readout is the weight of only the pumpkin.
|
|
|
Sunday, August 2
|
View Page
|
 |
Main Vine Stem Cut 2154 Sperry
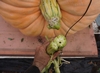
Inside of the mine vine near the pumpkin looks great and was moving a lot of water still. This was treated just like it was at an actual weigh-off with the proper length kept of main vine.
|
|
|
Sunday, August 2
|
View Page
|
 |
1430 DeBacco '26 UOW dmg (F: 2154 Sperry x M: 2587 DeBacco dmg) 31.7% Heavy!!
What a surprise!
OTT = 369.5"
Est. weight = 1085.5 pounds
Expected Range: 990.5 - 1179.5 pounds
This was a special pumpkin as it is only 51 days old and went way over chart. I know some people will say the measurements are off or the scale is not calibrated, because even I find it hard to believe the scale readout. There will be a cut away provided to get an idea of the structure, but hard to think there is much cavity and very sad to know that it split.
While this is only one pumpkin, it does bring into question that percent heavy is an old pumpkin trait. It seems that some (ex. 2154 Sperry at least for me) does not grow very impressively by the tape, but are actually packing on the pounds.
OTT measurements are an easy (and somewhat consistent) data point to take, it may not be the best and could be misleading. Where I think these measurements come into play in a more valid way is was has been called an enhanced OTT chart for estimating weights. This chat provides a range of weights for a given OTT. This is where the true outliers can be found and is something more growers should consider.
Link: http://web.archive.org/web/20131102065127/http://www.bigpumpkins.com/Attachments/Team-Pumpkin_2013_Enhanced_OTT_Chart.pdf
Yes, growers and weigh-off coordinators like a single number to match with the size of the pumpkin, but this is not as valid when there is natural variability with measuring due to the shape of the pumpkin.
This was certainly a pumpkin that had big potential at the scales, since it was so far out of the expected weight range for this size. So to all growers keep at the plant and pumpkin, even if the estimated weights are not what you were hoping for since it could be a surprise at the scales. While this could mean your pumpkin could go under the estimate, think positive;-)
|
|
|
Sunday, August 2
|
View Page
|
 |
1430 DeBacco '26 UOW dmg (F: 2154 Sperry x M: 2587 DeBacco dmg) 31.7% Heavy!!
Cut Away
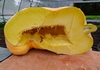
This was not only a thick pumpkin, but it was also a very dense pumpkin. Density is something that is hard to quantify but I have used the same saw for many years and this was a challenge to cut into the entire time. So, the thick walls in addition to the density of the flesh is the reason why this pumpkin went so far over the chart.
The split is hard to describe, but it was about 8" long and split the flower style ("nub") right down the center. The split was caught early so no rot or even soft tissue anywhere, just some white discoloration which can be seen if you look closely at the image.
It is shame to lose it, but I hope others growing the same seed get the percent heavy without the split. For a 51-day old pumpkin it is very interesting to see how thick the walls are, even toward the blossom end.
This at least shows the in-season growing practices are able to support a thick pumpkin. The actual structure of the chosen pumpkin may have just been unlucky. Either way the patch will have an early cleaning and the compost pile is getting an early addition.
One odd part which is also not a good sign is there were almost no seeds in this pumpkin. While I do not expect them to be fully mature there were only about 5 total seeds that looked like they could have matured and only about 5 more empty shells. Not sure if this has to do with the high percent heavy or heat during the flower development stage, but this was an unusual observation while cutting the pumpkin up.
|
|
|
|




 Matt D. - 2026 Grower Diary
